
Which no-code platforms export code in 2023?
Reading Time: 5 mins Which no-code platforms export code in 2023? By James Virgo No-code is great for rapid app development, but no-code has been proven to be shockingly


Which no-code platforms export code in 2023?
Reading Time: 5 mins Which no-code platforms export code in 2023? By James Virgo No-code is great for rapid app development, but no-code has been proven to be shockingly

Relationships in SQL – complete guide with examples
Reading Time: 10 mins Relationships in SQL – complete guide with examples By James Virgo In this article we take a look at the different types of database relation
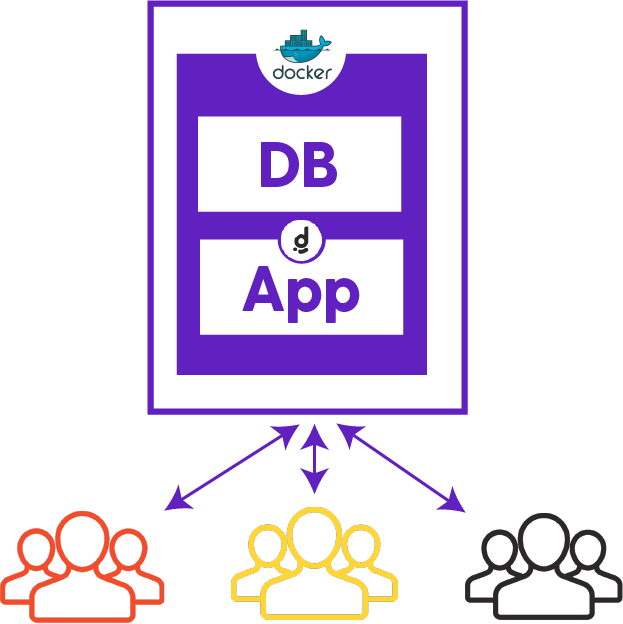
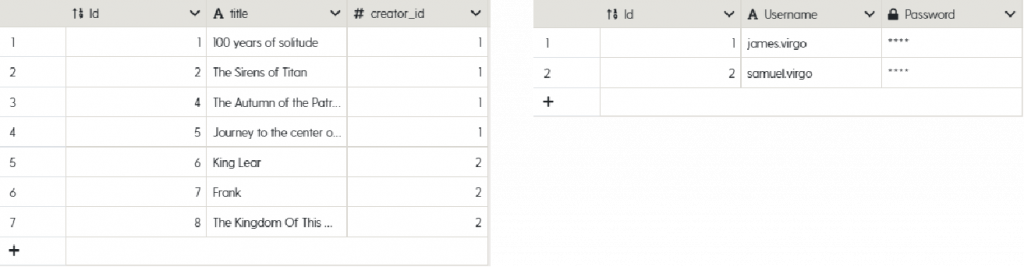
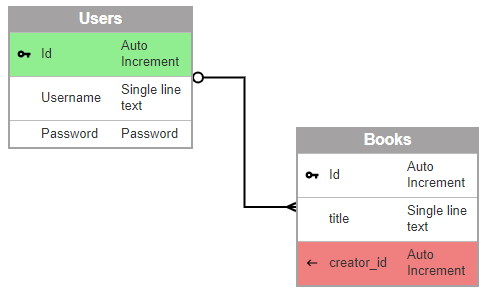
How to create database joins inside Dittofi hybrid no-code app builder
Reading Time: 7 mins How to create database joins inside Dittofi’s no-code app builder By James Virgo One of the central concepts in database design is “database joins”. A